Showing posts with label diy. Show all posts

diary XIV // creative ideas and winter outfits

Monday, July 21, 2014
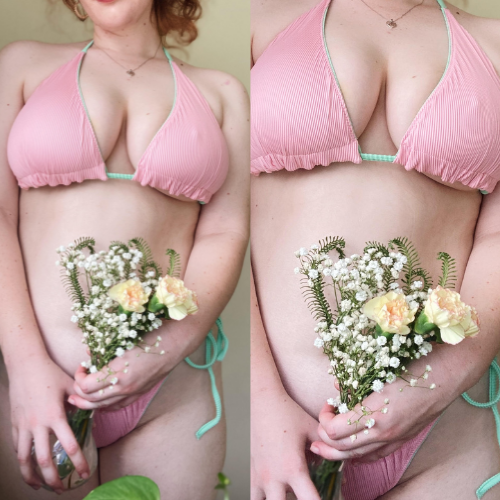
A few little things to do if you're bored: brighten up your room with some flowers in a glass bottle! it's easy, inexpensive and very pretty, make cupcakes with passionfruit and white chocolate (recipe courtesy of my friend Belle; they're so good), and play around with double exposure on photoshop! I'm still a rookie, but it was fun putting these pictures together all the same. 

Happy Monday! Sorry it's been so long since the last update - school has officially started again and I've hit the ground running (literally). It's been very busy the last few days with school work, social events and other things but it's nice to finally sit down and write for you guys and for myself. Today I went a little (OK, a lot) out of my comfort zone and joined the school soccer team because a) I've been testing out this whole 'yes' way of life similar to the move Yes Man where I don't say no to opportunities and b) I just kinda thought it would be fun. 
In all honesty, I was freaking out so much about it because sport is not something I am very well acquainted with; I generally stick to the half hour runs after school each day and that's that. Hand-eye coordination is a little rusty. Anyway, soccer was a grand success, I had a blast and our team won our first game. I am absolutely exhausted but it was great because the only thing I was thinking about was the ball. Sometimes I think pushing the boundaries of your comfort zone (or in this case, completely knocking them down), leaves you feeling like you've made a huge difference to your confidence/ well being and your attitude to everything else. I didn't want to participate today; I felt sick and I was moody, but as soon as the ball went into play I just forgot about everything and had a good time. I learnt something new about myself today. 


Here are some Winter/ Spring outfits! I've been experimenting with layers a little more this Winter and I'm loving the result. It's so much fun throwing different textures, shapes and patterns together. I love the pastels and the pop of red lipstick in the first outfit, the "horse riding" chic inspired jacket in the second outfit and the relaxed 90s feel of the third outfit. 

My wardrobe: Storage and Decorating Ideas

Saturday, January 12, 2013

Hello everyone! Hope you're all well. I've had a few requests recently to do a room tour post but I thought it would be better to do a wardrobe tour instead since I haven't got my other furniture from IKEA yet. I hope you enjoy this post and feel inspired by it in some way! It was lots of fun to put it together so I hope you like it!

Sunglasses from top: Portmans // Thrift store // Vogue eyewear // Big W 

I bought this jewellery stand/ mirror from Target in early August and I've never regretted it. It's perfect for keeping my accessories organised and in order and the mirror is full length so I can do my makeup and inspect my outfits! Multiple hooks adorn the top (perfect for earrings and necklaces!) as well as shelves for purses and sunglasses. 
This mirror also came with a lock and key so I can keep all of my precious things safe. Either side are also two little adjusting hooks that are perfect for hanging your bags on. I'm not sure where this would be available outside Australia but I do know that if you do live here there are some available at Homeart


If your walls are bare, a very cheap and easy decorating idea is to fill embroidery hoops with beautiful fabric and hang them. The little adjusting hooks on one side are also great for hanging flower headbands. I think this looks really pretty in my room and complements the colours of my clothing wonderfully. You can also hang hats up on the walls to add a vintage and very girlie touch. 

Kmart clothes rack ($12) // Typo Flower lights ($5)

When we moved in to our new house I discovered that my room didn't have a built in closet, which was actually completely okay with me because I've always wanted a clothes rack! I thought I would add a pretty touch to the rack though by entwining these gorgeous flower lights around the top, securing them tightly with tape. They were only $5 from Typo and look really beautiful, especially at night. 


I hang my bags on the the little hooks that adjust my mirror. It's the perfect place for them and really brightens the mirror up. I might have to buy some wall hooks eventually though as there is limited room left!


When it comes to my favourite magazines, I love having them near and easy-access. I stack them all up and store them underneath my jewellery cabinet. They look super duper pretty and whenever I need a spot of published inspiration I can lie on my floor and have bountiful magazines at arms reach!

~~~~~~~~~~~~~~~~~~~~~~~~~~~~~~~~~~~~~~~~~~~~~~~~~~~~~~~~~~
If you have any questions or other post suggestions, please leave me a comment below :) or you can email me: avenuemblog@gmail.com. I always reply and would love to hear from you!! ♥ 

How to: Glitter glasses! (miu miu inspired)

Tuesday, December 04, 2012

Happy holiday season, friends! We are officially in December, and I am officially freaked out. Where has 2012 gone? I don't even know. Well, to kick off the holiday season wonderfully, I have a festive diy for you all to try! It involves lots of glitter (one of my fave things), so to find out how to re-vamp the glasses like above, keep on reading ♥ I'd also like to give a big shout-out to my bestie, Izzy, for helping me with the photos! Her camera is seriously a magical thing. 


You will need: strong glue (any sort will do), glitter (get creative and use rainbow if you'd like!), scissors, a palette or plastic plate, newspaper (to keep the area as neat as possible), paintbrush (to apply the glue) and lastly, a pair of sunglasses (I got these from an op-shop this morning for $2!) 


Squeeze a small amount of glue onto the palette, as well as glitter (pour out a decent amount, this will make it easier to the dip the glasses into it).


This step is optional, but in case you're a little messy with the glue, you can tape in between the glasses hinge, to protect it. 


Begin painting the glue onto the sides, evenly distributing it making sure that there aren't any noticeable clumps. 

Sprinkle the glitter! Then, follow on from that by patting the sunglasses into the palette, so the coverage is as even as possible. 


Repeat the same process onto the rim of the sunglasses, being careful not to get too much glue on the lens (don't worry if you do though, it can be easily rubbed off after drying with nail polish remover). 


And, voila! Now leave them out to dry for at least an hour, then spray them with a fixative to keep the glitter in place. You now have a funky pair of glasses inspired by Miu Miu for much less. Seen ya'll soon!


Onto some other news: my dance was incredible! I can't wait to show you guys the pictures Sarah, Lauren and I took. They are super lovely! I have a few pictures here, here and here if you're anxious to see what I wore and how my hair was though. Enjoy the rest of your day! ♥
P.S: I looove this song!

DIY: How to make your own envelopes!

Sunday, June 24, 2012

Hi everyone! So, I have a a confession to make: I'm a stationery junkie. I love, love, love collecting and making my own writing paper and envelopes. Not only is it calming, easy and exciting (who wouldn't want to receive a hand made letter in the mail?) for the recipient but the only limit to your decorating is your imagination! With a special request from Katie of Beautifully Pure, I've decided to show you an easy way of making your own envelopes. Good luck, and I hope you like this little DIY.

You will need:
Lots of pretty paper! It can be of any kind. I bought some beautiful vintage wrappings from an op-shop for only 20c a piece!
Scissors, glue, lead pencil and an old piece of card or thin ruler
You will also need an envelope as a stencil. This has to be folded out as shown below in step 1. 

1. On the opposite side of your chosen paper, lay the folded out envelope. 2. Sketch lightly around the edges of the envelope. 3. It should be light enough that you can't notice it on the other side. 4. Carefully cut around the lines that you drew (sorry it's so hard to see on mine, the lighting wasn't perfect!)

5. It should look exactly like the stencil. 

6. Using the ruler or card, fold (making sure it is straight and even) along the edges of each flap and make a crease. 7. This is what the envelope will look like 8. Glue along the inner edges of the two sides and press the bottom up to the edges. 9. You now have an adorable envelope!  

...why not make some more? ♥ 

I adapted Christina's original envelope tutorial for this DIY.  

two weeks of winter: creative ideas

Thursday, June 21, 2012
A few little ideas to plan my holidays out. DIY projects, cooking parties and afternoons set aside for reading and tea. 

 This floral scalloped collar is nothing short of a dream come true! It looks quite simple to make and would add the perfect amount of charm to a simple white blouse. This collar was made by talented sewer and etsy seller, Theresa. Visit her store here: Scandivintage

Gifts in a jar? Yes please! Wondering what to fill them with? Here are 27 ideas!

I haven't yet made red velvet cupcakes and am thinking it would be splendid to make these. I think the cream cheese frosting makes it all the more tempting, don't you? 


Gosh, I'd been looking everywhere for a tutorial on how to make these beautiful wind-up paper butterflies, and I finally did! They are the perfect little gift to slip into a letter to someone special. You can make one here too!

Put flowers and braids in your hair. At the same time. *sigh* 

And, last but not least, listen to this while you are DIY-ing, cooking or daydreaming. You will be whisked away to Paris as soon as she starts singing...


a pretty diy

Wednesday, April 11, 2012

With inspiration from the Ruche blog, Izzy and I set to work on lovely perfume trays today. It was a lot of fun and surprisingly easy for such a beautiful display piece. All you need is a white frame (we painted ours white), decorated paper, lace or doilies (whatever you think will match your fragrance collection), glue and a few decorations. I found some pretty paper roses in the craft store yesterday that added a nice touch to the frame. Simply insert the paper into where the photograph should be, glue the decorations onto the frame and arrange your perfumes nicely. You can read about the full instructions here. I highly recommend it; it's so easy and looks lovely on any duchess or table.

Onto other news, yesterday I got my braces. I know it will be all worth it next October when they are removed, but they hurt so! Today I've been eating lots of 'soft' foods like porridge, noodles and pureed fruit. Thankfully the pain with have surpassed within the next few days and I will be back to eating like a normal person and not wincing at the dinner table, hehe!
Enjoy the rest of your week! ♥

Oh, and I am now on Facebook!